Friday, August 21, 2009

Avery's Room Part II

My shopping radar proved to be faithful yet once again. We went to Lowe's the other day for something for the yard and I thought that I would go and browse through the lighting section really quick. And there it was on clearance for $37, marked down from $180! Needless to say I was very excited! I begged the hubby for it and marched it to the check out!
I have been looking for a chandeleir for my daughter's room for some time and haven't found anything for less than $100! So this was a happy day for me! It wasn't exactly what I wanted, but I knew I could change that!
I don't know if you can tell in this picture or not, but the fixture is cream. I wanted white. And the shades are a bit ugly, but I figured I could change that too!

BEFORE:

I painted the whole thing white with a stipple brush, decided to take off the shades, and sewed a long strip of material to cover the chain. I am quite happy with the results! It makes her room look so cute!
AFTER:Here is a cloese up of the chain cover

Close up of the detail!

More detail!

Before the flowers were taken off! Yucky!


Much better! I may reuse them and put pink flowers all over the whole shade. Or maybe just some trim on the top and bottom of the shade.

Monday, August 10, 2009

To Paint or Not to Paint

I have been deciding for quite some time if I should paint my master bath or not! The first two pictures below are of a master bath in a model home that I really liked. The last two are of my bathroom. The tile, trim and cabinet color is similar to mine and I really like the wall color. So, since I can't decide on what to do I need your help!
To paint or Not to Paint?

Model Master Bath:


My Master Bath:


Monday, July 27, 2009

Shopping Radar!

I have what I like to call "Shopping Radar"! I will be thinking of something that I would like and then one day it just hits me! I need to go shopping!
So lately I have been thinking I need to go check out the new Crazy 8 store for school clothes for my kids. Plus I just did not want to clean the house that day! So I got all ready and right before I left I checked the mail. What do you know there was a 20 percent off coupon in the mail waiting for me! It was a sign! So I head off to the mall with 3 children, expecting only to find a few things, and I found a ton of stuff! The pictures do not show everything, but in all I found 9 pairs of jeans, 16 shirts, 1 dress, 1 pair shorts, 2 hair bows, 1 pair barrettes, 1 bracelet, 2 pair of shoes, and 1 stuffed guitar that my 3 year old insisted on having for $319! I am pretty much done shopping! And for three kids I did not think that was so shabby! And my coupon that happened to jump in my mail box before I left, saved me $60! I only paid full price for 2 items!
Thank you coupon!


Friday, July 24, 2009

Photographs!

I have been taking advantage of the summer and have been LAZY! I love sleeping in and not having to worry about being anywhere! So sorry about not posting for awhile!

Here are some of my favorite pictures that we have had taken or I have taken in the last couple of years! Photography is something I enjoy, but do not do it often enough!

ENJOY!


Sunday, July 5, 2009

Happy Fourth!

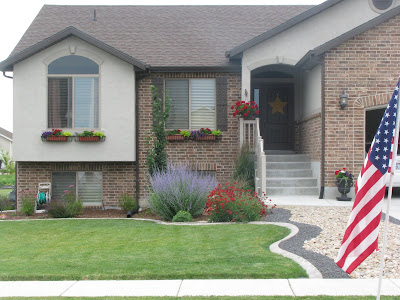
I am a Patriotic person at heart! There is something about that American Flag that I just love! Especially waving in front of my house! I am so grateful for all the many men that have sacrificed there lives for our Freedom for so many years! Thank You for our freedom!
Happy Independance Day!


Thursday, July 2, 2009

Part II of Avery's Room Makeover

My good hubby had a few days off a week or so ago and got some of his "Honey-Do-List" done; with my help of course!
One of the projects we got done was the molding in my daughter's room. I originally wanted to do bead board, but got lazy and went for a little more formal look with some molding.
This was very simple to do. With some good measuring, a miter saw, and a nail gun we got it done.
This is a picture of the 1 1/4" molding on the miter saw being cut on the right side at a 45 degree angle. I had 8' moldings so I did a square 2'x2'.


This is the left side of the molding being cut at a 45 degree angle. Make sure to measure right so that everything squares up at the end.


We measured everything out on the wall, put a few pencil marks, used a level to make sure they were straight and nailed them up.


This is a picture of it all painted with all the furniture back in place. Sorry you can't see it that well, her huge bed takes up the whole wall. The bedding by the way is not done yet. I can't decide whether or not to keep the black and white on it. What do you think? I will be making some pillows in the near future that will tie everything in better. But this is it for now!


This is the other side of the room

This is her growth chart on one small wall by her door that I painted for her. No, I have not put her height on there yet! Bad Mom!


Here is the material that I will be making her pillows out of soon! I just need some darn motivation!


Wednesday, June 10, 2009

Bathroom "updo"

Bathroom Redo
I love beadboard and have had some sitting in my garage for like 3 years! I decided that it might look good in my bathroom. So out came the tools!
BEFORE
This is one of the best air compressors! It is small and compact! I can bring it right in the house by myself without any effort! Along with my handy dandy nail gun!


This is the bead board after I had "ripped" it on the table saw outside. All by myself, mind you! The sheet was 4'x8'! It was quite the sight! But, I got it done with all fingers still attatched!
I had to take down the towel bar. This is the beadboard on the wall stappled up!
I cut it in two separate pieces, so I will show you how to cover up that big line down the center.

To cover up the nail holes and the line down the center you will want to use some joint compound. It is the same stuff that they use to mud sheetrock. I used a small putty knife since I was doing a small area.


Next, I put up some trim. It was really inexpensive at Home Depot. Maybe .50 a foot. It has a lip on the inside edge so that it will fit right over the beadboard. Sorry, I forgot to take a picture of that part! Measure, nail it up, and fill it in with some paintable latex caulk.


This is the finished project. I painted it the same color as my trim. Almond white from Kwal. All painted and everything, from start to finish took about 3 hours. Not bad for a days work! What do you think?
AFTER:


Friday, June 5, 2009

One of my Favorite things

Gardening is one of my favorite things!

I got up this morning before my kids and was able to get one of my goals done for the day!
I know ya'll are jealous of my dead bushes! Well, I wasn't either! So I decided to rip them out of the pots and plant something a little more pleasing to the eye!

This is a picture of the bushes ripped out, but the dirt needs some major help!


Got my good ole' soil pep from the store


Added it to the dirt and mixed it up really good until I got this!

Much better!


I pre-placed the plants so that I would know just where to put them.
Make sure when doing this type of pot project to get plants that are cascading or trailing, so that they will flow over the pots edge once they get a little bigger.
You can not see it here yet because the plants are not mature. It should only take about a month before you are able to see the effect these type of plants should have.


All put into the soil and in front of the house!
I was happy with the results!
Looks much better than those dead bushes, don't ya think!

TIP: Make sure also to water these plants once a day, in the morning and with a every day fertilzer. EX: Fertilome, Miracle Gro, etc. It makes a world of a difference in the growth of the plants!


After I planted my pots, I decided to go and take some pictures of some of my favorite plants in my yard. It is three years in the making and some of it is finally maturing. I have never seen any of my yards mature because I always get to antsy and want to move before then. So I am hoping to stay in this house long enough to see my yard become my vision.
My dog "Titan" had to get in the action on my way to take some pic's!


"Catnip"


"Japanese Maple"


"Hosta"

Here is a picture of my climbing roses I planted last year on my new arbor!

They are growing fatastic!

This is a picture of the arbor last fall right after I finished putting it up.

Here is a semi-after picture I took today. I still have to stain or paint the bird house. I can't decide. And I would like to add a couple more plants. I just planted the purple "Clematis" vine at the bottom of the bird house a couple of days ago. It will climb up the 4x4 the bird house is on hopefully by the end of the summer! I can't wait until my roses are all the way up my arbor!


Here is one of my favorite flowers in the yard and I am really sad to say I don't know the name. I know that they are in the cone family.
Last but not least my "Hanging Geranium Basket"! I get one of these every Mother's Day and it is my absolute most favorite plant in my entire yard! There is something so classic about a Red Geranium. I love them!

Thanks for passing by! I hope this inspires you to get out in that yard and do something spectacular!
Related Posts with Thumbnails