Showing posts with label Thrift Store Transformations. Show all posts

Thursday, August 19, 2010

I am Still Here!

I am still alive!!!  I can't believe it has been so long since I have blogged!  Over 3 months!  Holy Cow!   We have had a busy summer and I have just felt like a needed a huge break!
But I am back in the game now!
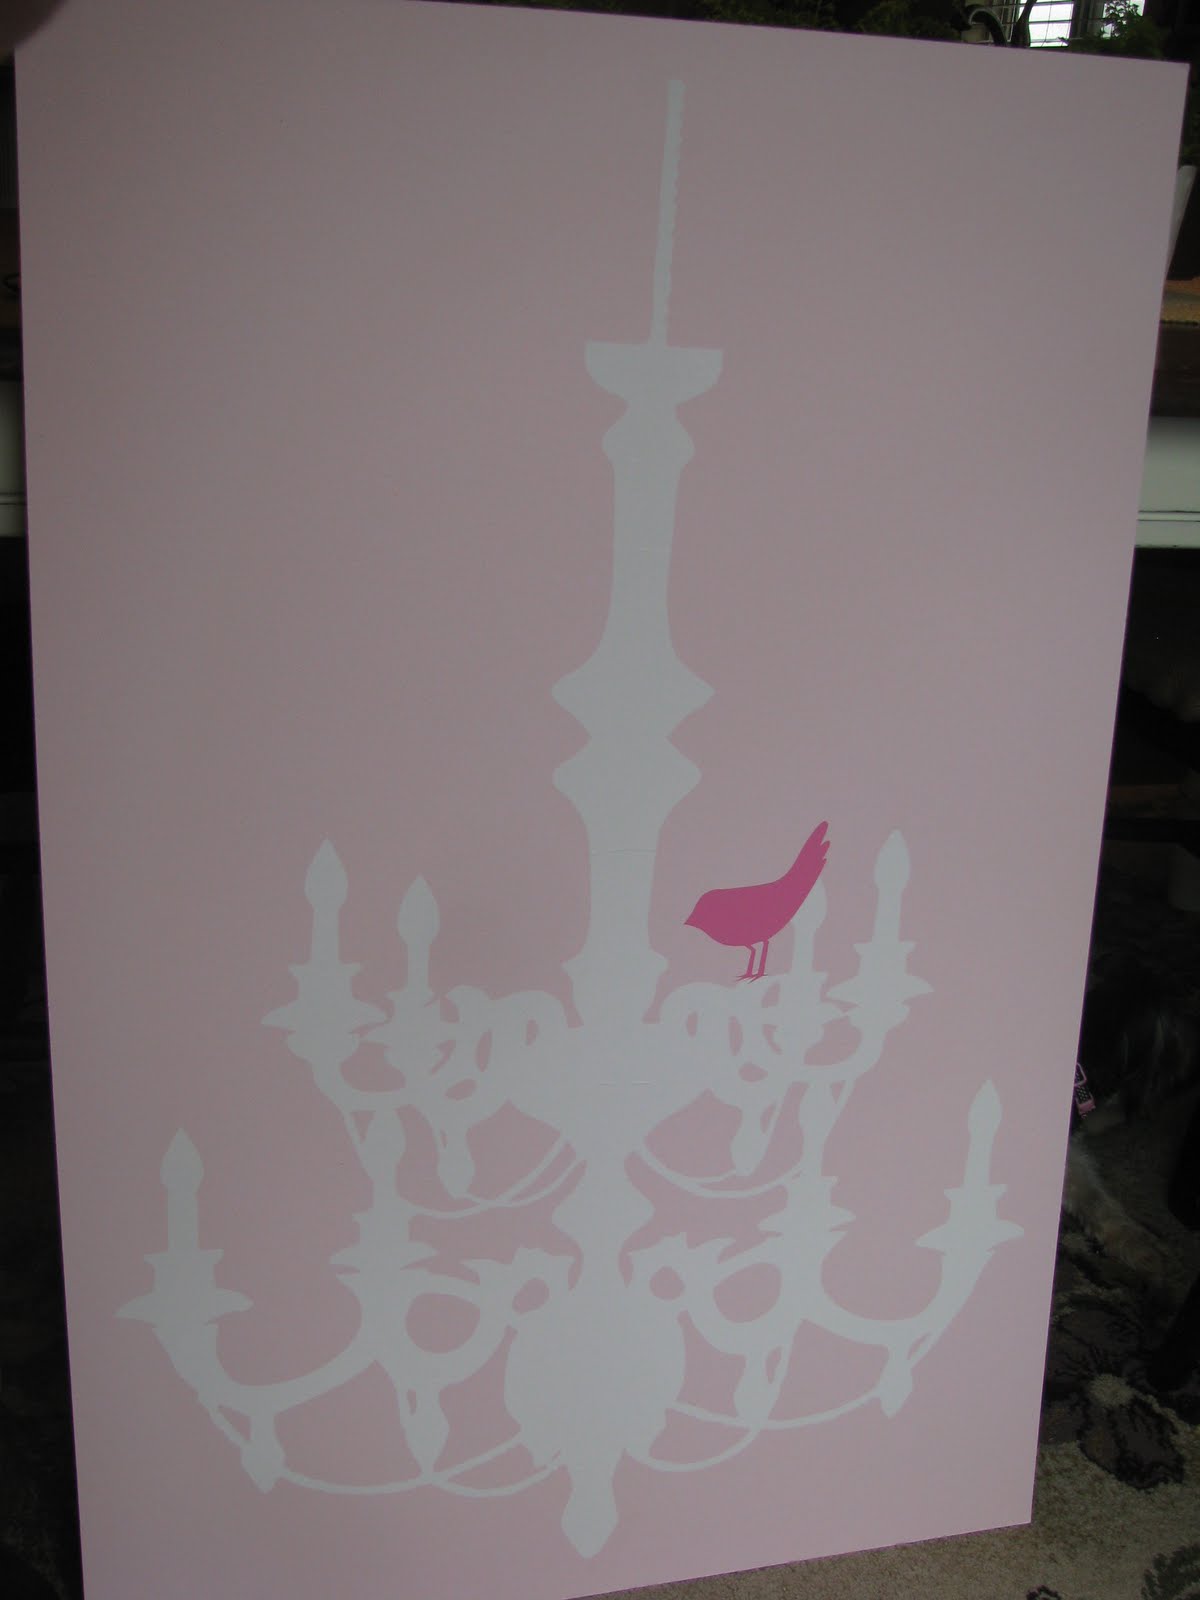
Awhile back I started to do my friends kids' rooms.  I am going over today to hang up this vinyl chandeleir that I finished last night.  And then I will post the rest of the pictures of her room.  For now here is how I did the hanging.

Paint, primer and rollers

Board found at Thrift store for $2!

Primed, Painted and Vinyl

Friday, March 19, 2010

A Pin Board Re-done

Here is another project that I have done for my friends little girls room.  This is for her eldest daughter.  The mirror in the post down below is for her middle daughter.  Her eldest daughter "A", is 8 years old.  So we wanted to do a room for her that she can grow into.  I found this pin board at the thrift store for $4.  I spray painted it a high-gloss black, cut out some burlap, glued it on with my hot glue gun, took some pretty damask ribbon and glued that on!  I think it turned out pretty great!

Before:


After:


Now with the ribbon.  I think it just tops it off!


A Pretty new Pin Board for a pretty girl!

Monday, March 15, 2010

A Mirror Makeover

My Good friend needed help with her kids' rooms.  I told her I would be happy to help!  I also said that I could do each bedroom for $100!  So, thrift store here I come!  Here is a mirror that I found and madeover for one of her girl's bedroom!

Here is how it started out!
$10 Mirror
Wasn't really going for the Safari
theme, so it had to be changed!

Had some damage that I fixed up
with some good 'ol wood putty!


Got out my trusty cans of primer and paint

Primed and painted the edges

Layed out my scrapbook paper and
decided which order I wanted them to go in.
Paper $4

I took each paper one by one and layed the straight edge of the paper against the straight edge of the mirror and then with my finger I just ran along the curve to dent the paper.  I then cut it out, layed them in place and applied modge podge to the mirror and layed down my paper.  Be sure to press well to get out all the bubbles.

Here it is all done!
After

Before

I hope they will be Happy with the results!
Total cost $14

Tuesday, March 9, 2010

Spring Thrift Decor!

I have always wanted a old wire or wooden basket to put on my porch.  As luck would have it, I found one yesterday at the thrift store!  Along with a spring looking flower thing!  It made a nice addition to my Spring Decor!


Monday, February 22, 2010

We made it to the front page of HGTV!

My Avery's room made it to the front page of HGTV.com!!!  This is for sure the highlight of my day, maybe week or month!  We are the one of the pictures on "See what your neighbors are doing on Rate my Space". 
You can go on the website http://www.hgtv.com/ and Rate our space! 
My username is sunshinesdesign!

Friday, February 19, 2010

A room fit for a Princess!!!

I have once again re-done my almost 6 yr. old's room.  I have never been quite satisfied with it.  This time I think I acomplished what I had invisioned in my mind.  I wanted something very soft, sweet and feminine.  She loves pink, so of course that had to be incorporated into the design.  I wanted a chandeleir, someplace to put knick knack's, her doll house, art that was all her own, a quilt, and some cute pictures of her.  Words with meaning, mean a lot to me, so there had to be some form of them in her room. 
 Here is the BIG reveal!
Before:
After:
Put bed on opposite wall so it is the first thing you see when you open the door.
  Added MOLDING (go here), repainted,
added some vinyl, went thrifting and spray painted A LOT!


Before:
Replaced Chinese Laterns with Chandelier
After:


For chandelier makeover go HERE


Bookcase Before:
$13 makeover ($9 for thirftstore book case, $4 for wood decals, already had primer and paint)
This originally had two doors on the bottom, which I took off. 
Sanded the whole thing down, added crown molding, filled in pinecones with wood putty, added wood detail, primed and painted.  Whew!


After:
Ahhhhhhh!
It already came with the light in it.

This plate is my daughter's Great-Great Grandmother's

I added some styrofoam to the back and covered it with material. 
Just a special little place for her to pin her junk things on!

I always take control decorate the kids' rooms how I want to with a few thoughts from the them. 
But I wanted there to be something in 
Avery's room that was special to her. 
Something that she did all by herself.
So we went to the craft store and go this canvas and let her go to town on it.  This is what she came up with, which I think is very sweet.  It is a picture of me and her holding hands. 
For canvas art go HERE

Before:
Candlesticks purchased at the Thrift Store

After:
Primed and painted white

Stool:
Her bed is a little high so I made this stool for her.
For transformation go HERE

This chair was Avery's Great Grandmother's.
For chair Re-do go HERE
The bed was oak, I painted it red for my son's room,
 now white for Avery's room.

Shelves are from the Thrift Store
Round frames purchased from a garage sale, 
painted black, and added some scrapbook paper!
Doll house purchased from the Thrift Store for $25. 
 I took out the carpet, painted the house white and pink (already had white paint & got pink paint for free on Glidden.com), 
added beadboard painted Olive Branch (Kwal) to match her walls.
(sorry not a very good picture to show the colors)

Painted a little detail in the Doll house for her

Meaningful Words

I painted this growth chart on her wall,
although she has almost outgrown it already!

I tried to do this room on a budget and
with things that were meaningful to both Avery and I. 
The sweet, feminine, & meaningful I think were all accomplished!
Hope you all enjoy looking at this as much as we do!

Related Posts with Thumbnails