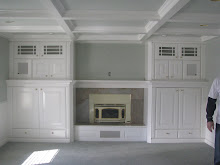
Does anyone have baseboards that look like this?
I knew they were bad, but once I took these pictures and looked at them, they are REALLY BAD! A picture never fails at telling the truth!
Our house is only 3 years old, but I have to be honest it has taken a beatin' in those 3 years! I have 3 young kids and with toys and balls flying everywhere there are certainly places on the walls that need fixing! So here is what I did for a little freshening up! PAINT!
BEFORE:
BEFORE:

AFTER:
(Sorry about the blure! My darn camera was not being very nice!)


Step 1:
Use the same paint color you had on your baseboards as before unless you want to change the color all together. In my case I just wanted to fix a few. I already had my paint color in my basement. If you don't you can always take part of it in and get it color matched at Home Depot. They have pretty good machines that will match it the same color every time! So the girl told at the paint department!

Step 2: Just get a little bit on the brush so you don't make a big mess and get it on the walls. Mistakes are a pain in the buttocks to fix later! And make sure you have an angeled brush. It makes your job of cutting in close a whole lot easier!

Step 3: Cutting in can be a little tricky! Just make sure you get some of the paint off on another part of the baseboard before you put the paint brush right up next to the wall or else you will get some the wall for sure! Then just nice and steadily put a little pressure on the inside of the brush and move it along! This way it saves you from having to tape. Save you some money and a lot of time.

This is after one coat of white paint. It looks a little dinged up in the picture still, but when you are standing up away from it it looks 100 percent better! It makes me feel like my house is brand new again!


Step 2: Just get a little bit on the brush so you don't make a big mess and get it on the walls. Mistakes are a pain in the buttocks to fix later! And make sure you have an angeled brush. It makes your job of cutting in close a whole lot easier!
Step 3: Cutting in can be a little tricky! Just make sure you get some of the paint off on another part of the baseboard before you put the paint brush right up next to the wall or else you will get some the wall for sure! Then just nice and steadily put a little pressure on the inside of the brush and move it along! This way it saves you from having to tape. Save you some money and a lot of time.
This is after one coat of white paint. It looks a little dinged up in the picture still, but when you are standing up away from it it looks 100 percent better! It makes me feel like my house is brand new again!


No comments:
Post a Comment
Sunshine Design Friends said: